Finally, I’ve decided to bite the bullet and go for it. Months after first hearing about water marbling nail art I have, on this fine Wednesday afternoon, got round to giving it a whirl (literally). To be honest it was a bit of an impulse move, I entered into it more for experimentation purposes than anything else. Could that snazzy, swirly design really be achievable outside the realms of YouTube? I decided to give it a go with one nail at first. After prepping my nails with two coats of white (it makes the colours pop more, apparently) and taping around the edges to protect the skin and minimise mess (ha ha), I took a mug of tap water which I’d let stand for a couple of hours to ensure that it was room temperature, and dropped in my first polish blob. To my surprise and mild delight, it spread out beautifully, so I continued blobbing in alternate colours until the surface of the water was covered. After that I anchored the polish to the edges of the mug using an orange stick, then used the stick to swirl the paint into a psychedelic design.

Blob-tastic!

Post-swirl: not the best of all the attempts but the only one I managed to catch on camera.
Then it was time to dip. I lined up my nail horizontally with a particularly appealing part of the design and took the plunge. After waiting a few seconds for the paint on the water to dry, I collected it with the orange stick (think the skin on custard) and slowly removed my finger from the water. Well, it wasn’t quite what I was hoping for, but essentially, water marbling had worked!

First and foremost.
I decided to go back in with more nails, this time dipping three at once to save both on time and nail paint. Once all the nails were safely dipped, I waited a little while until the polish was touch-dry and removed the tape before cleaning up around the edges with nail polish remover and adding a top coat. Here are the finished results:

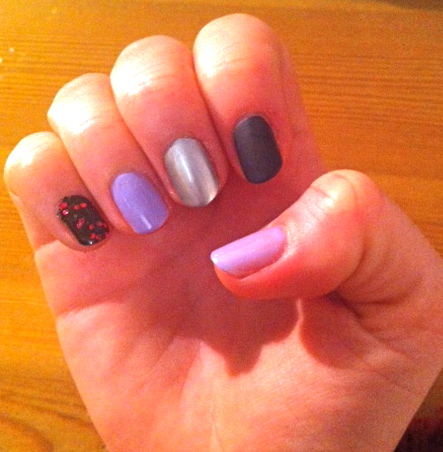
My finished first marble!
I have to say that I’m pretty pleased with the outcome. The colour selection was somewhat accidental- I just grabbed what was nearest to me, but I think the navy and white works really well, it brings to mind ancient Chinese porcelain! I love how the marbling gives a different, intricate effect on each nail and the overall look is really eye catching. I’ll have to wait and see how the design fairs in terms of durability, but it’s definitely a winner if you want an easily achievable, show-stopping nail look!
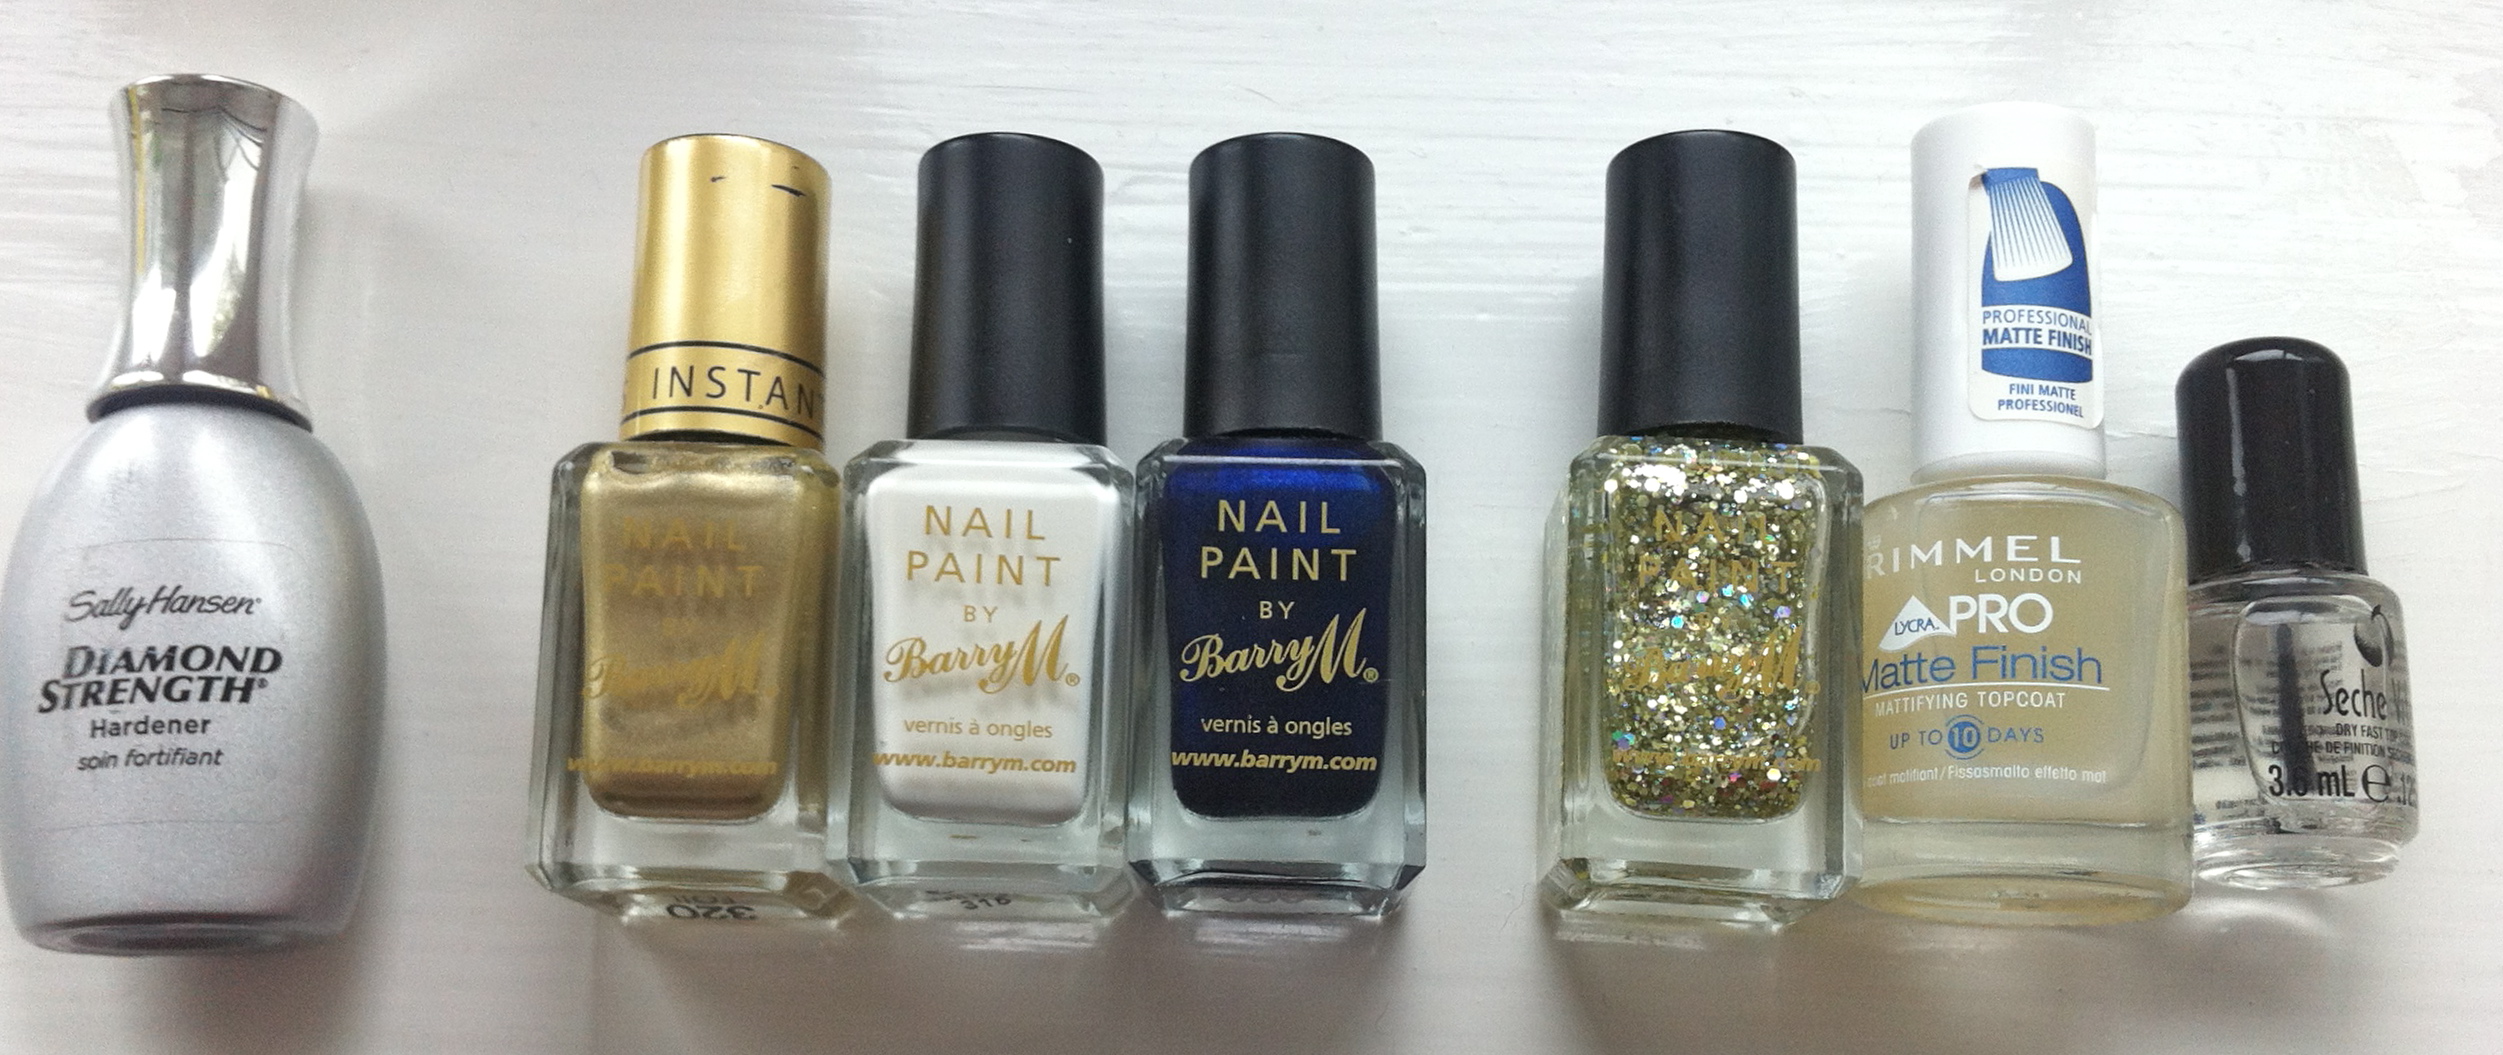
Materials used:

A cup of room temperature tap water
Scotch tape
An orange stick (you could also used a tooth pick or an empty ball point pen)
Sally Hansen Diamond Strength Base Coat
Matt White and Navy, both by Barry M
Seche Vite Dry Fast Top Coat